Setting up Google Analytics and Facebook Pixel using Google Tag Manager
In this guide we will show you how you can use Google Analytics (GA), Google Analytics 4 (GA4) and the Facebook Pixel to track sales and visitors on your TicketCo pages, using our Google Tag Manager (GTM) template.
Access to the Google Tag Manager and Custom Scripts features will have to be activated by us, so send us an email to support@ticketco.events and we will assist you.
Throughout this article, you can click on the images to enlarge them.
Which accounts do I need?
Please note that you will need the following in order to use this guide:
- A Google Tag Manager account - To set up tags and pixels on your TicketCo page
- A Google Analytics account - To track visitors on your pages
- A Facebook Business account -To monitor sales and build custom audiences based on visitors/buyers
GTM Template
To get started, download our Google Tag Manager template from this link ↗ or from the link at the bottom of the page. Our template is designed to help you easily set up your GTM container, and the steps outlined below will help you to successfully deploy the tracking of your sales on your TicketCo pages.
If you have an in-house or external digital marketing expert, then they may be able to set this up manually. In which case, they can skip ahead to Step 5 in this guide, which outlines how to input a GTM Container ID into the Promote section in TicketCo.
Step 1: Import the template

In Google Tag Manager, click Admin and Import Container, then upload the “Container-Template(GA-GA4-FB).json” file you just downloaded (see the link above). We would recommend using an “existing workspace”, and the “overwrite” option. Please note that this will overwrite any tags you have already created. Click Confirm to complete the import.

Step 2: Setting up your Facebook Pixel
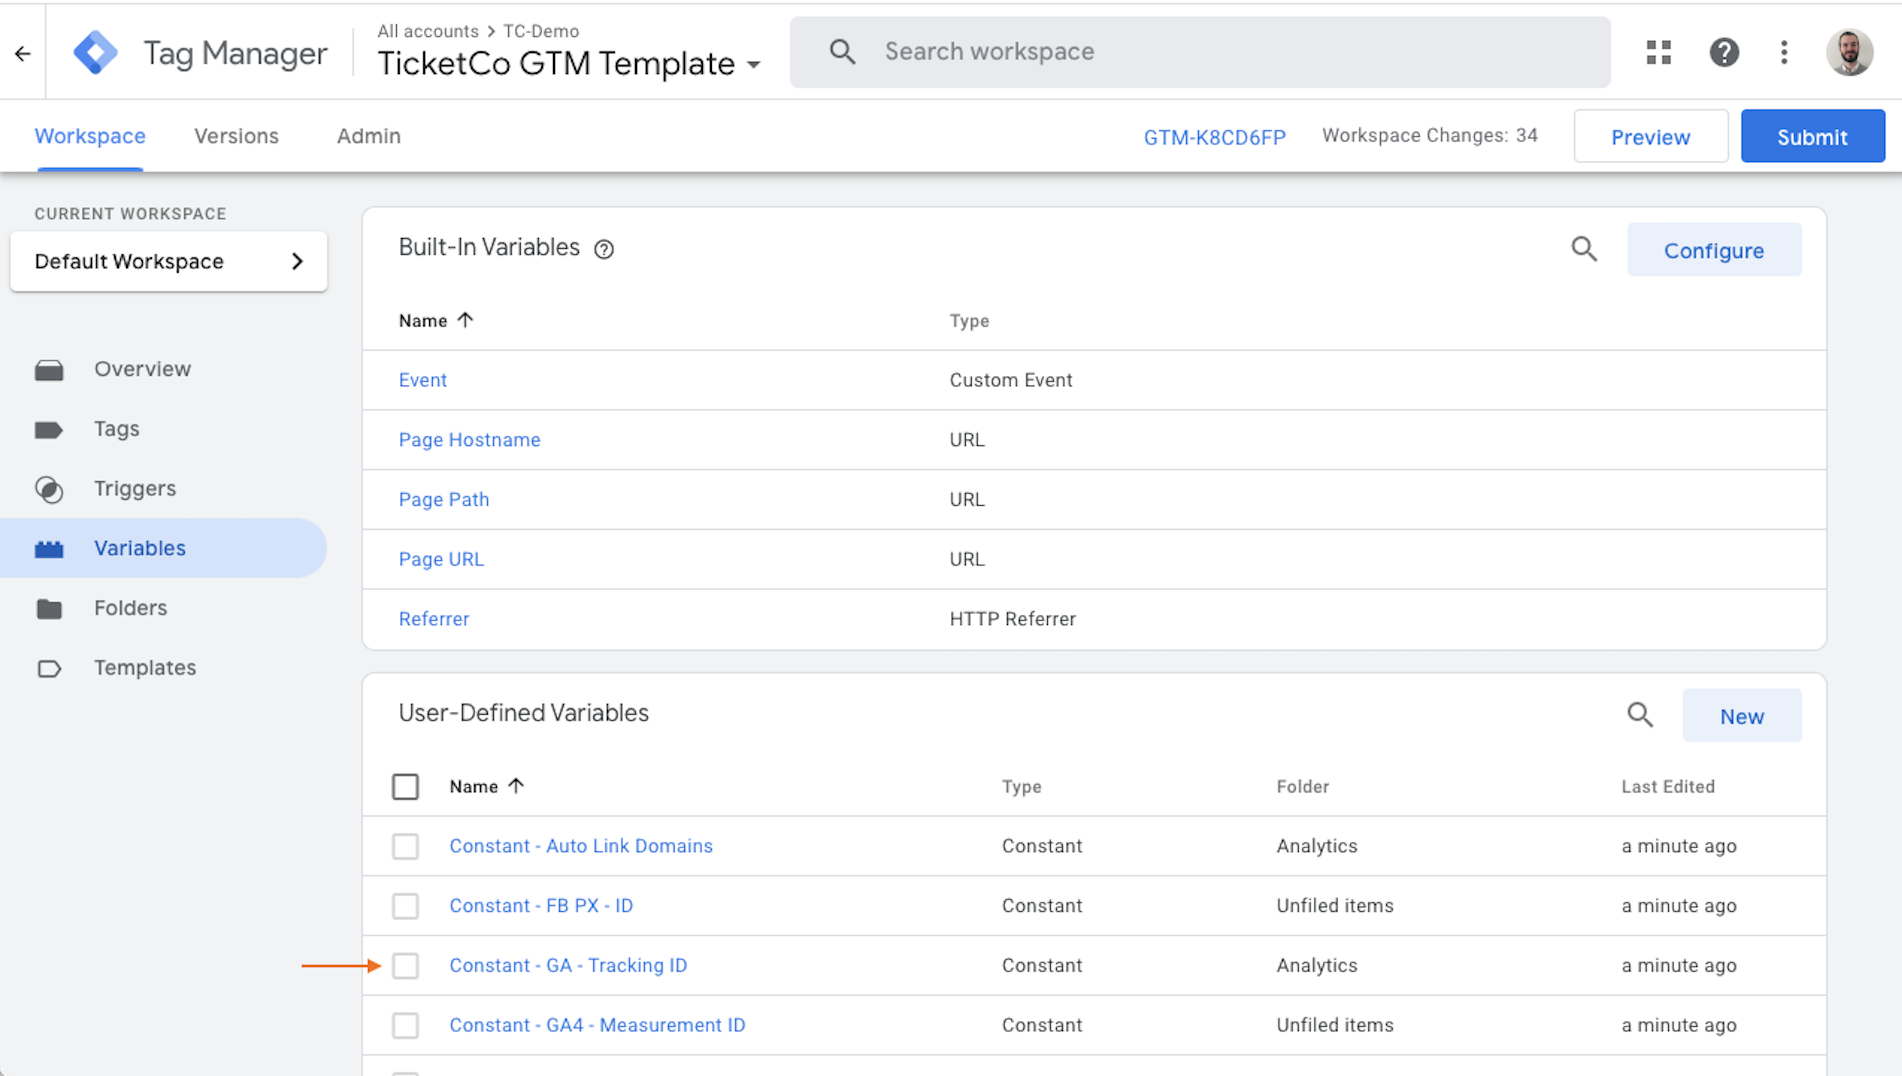
Select Variables from the side menu. We will need to make a couple of small changes here. (Click the pictures to enlarge).
 |
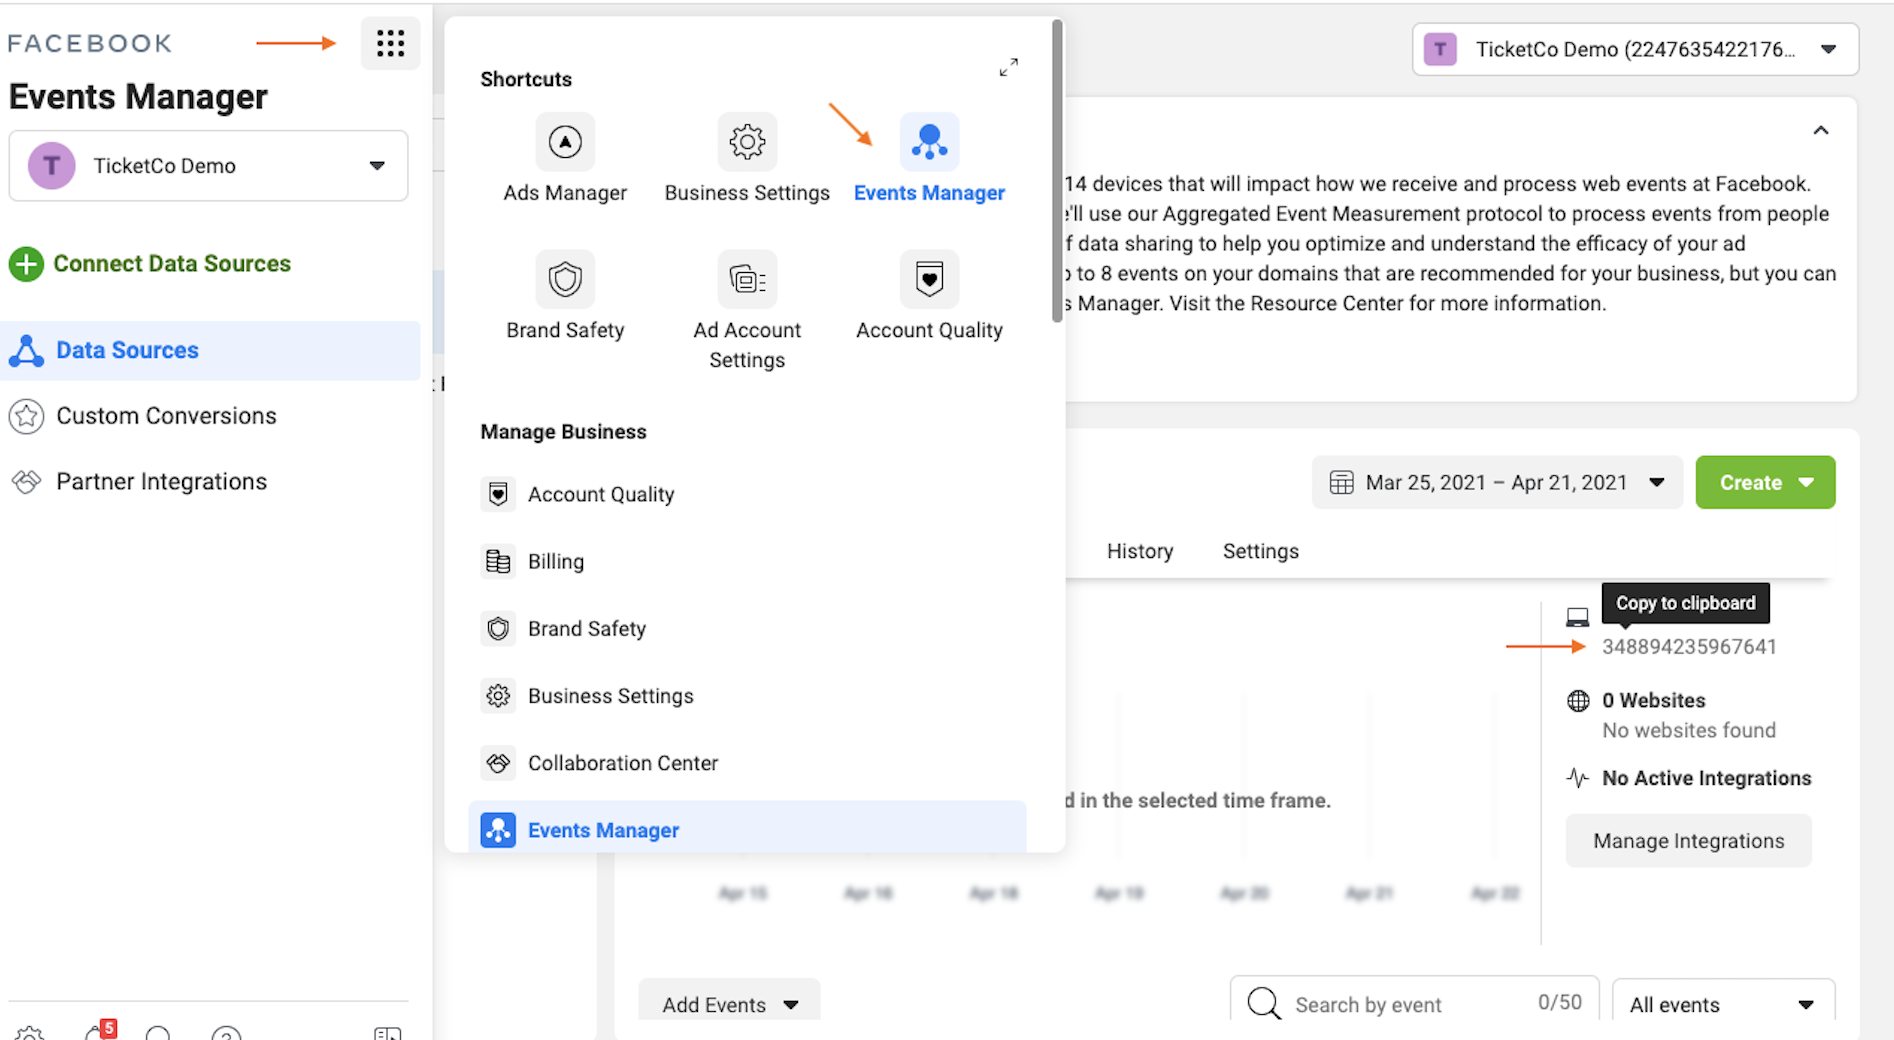 |
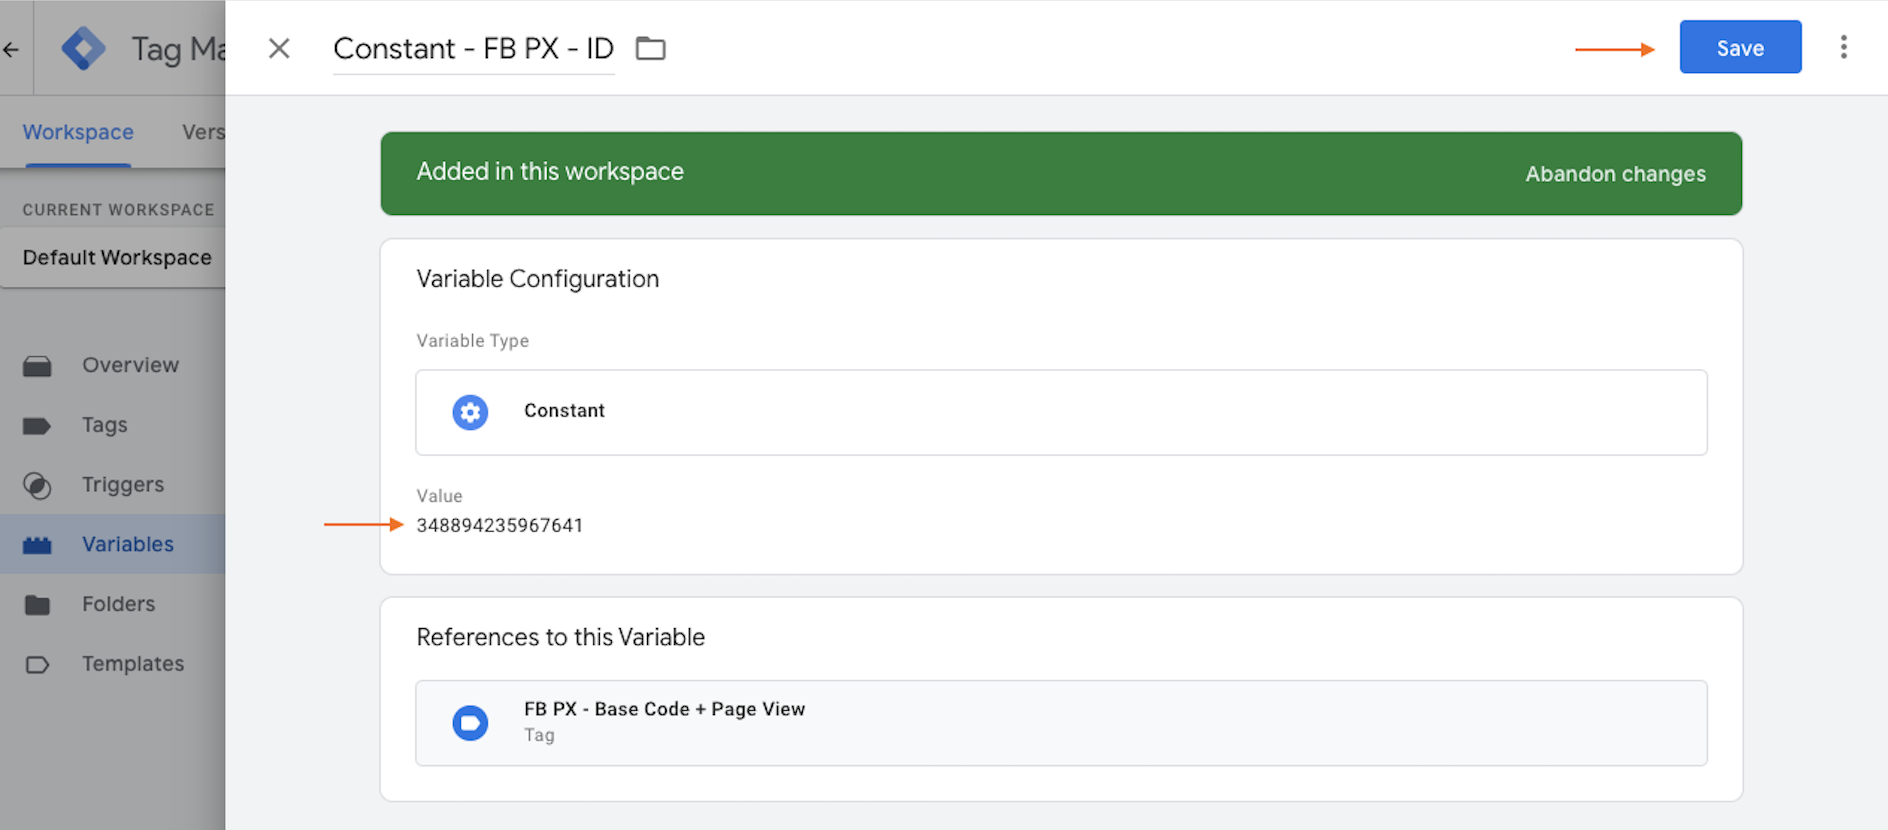
Open your Facebook Business Manager page, and navigate to the Events Manager page through the menu icon. Select the Pixel you want to use, then copy the Pixel ID. Go back to Tag Manager and open the variable called Constant - FB PX - ID, paste the Pixel ID in the Value field and hit Save.
Step 3: Setting up Google Analytics (Universal Analytics)
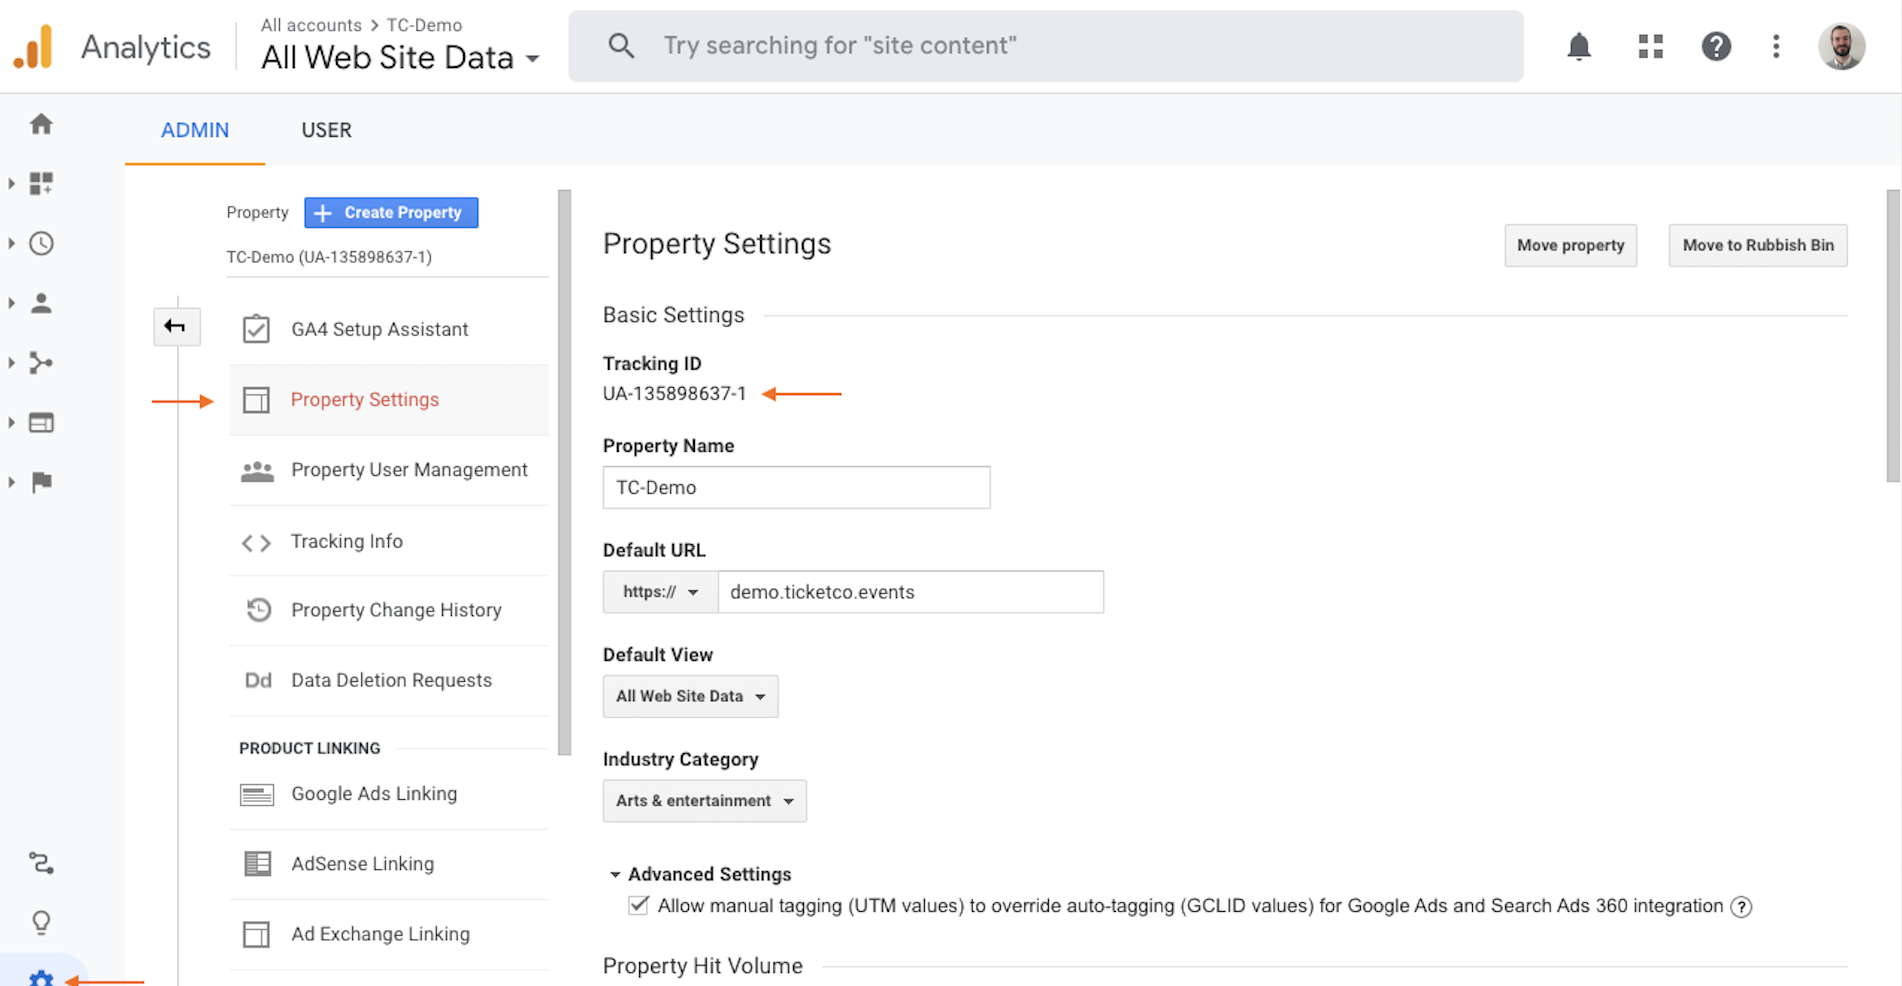
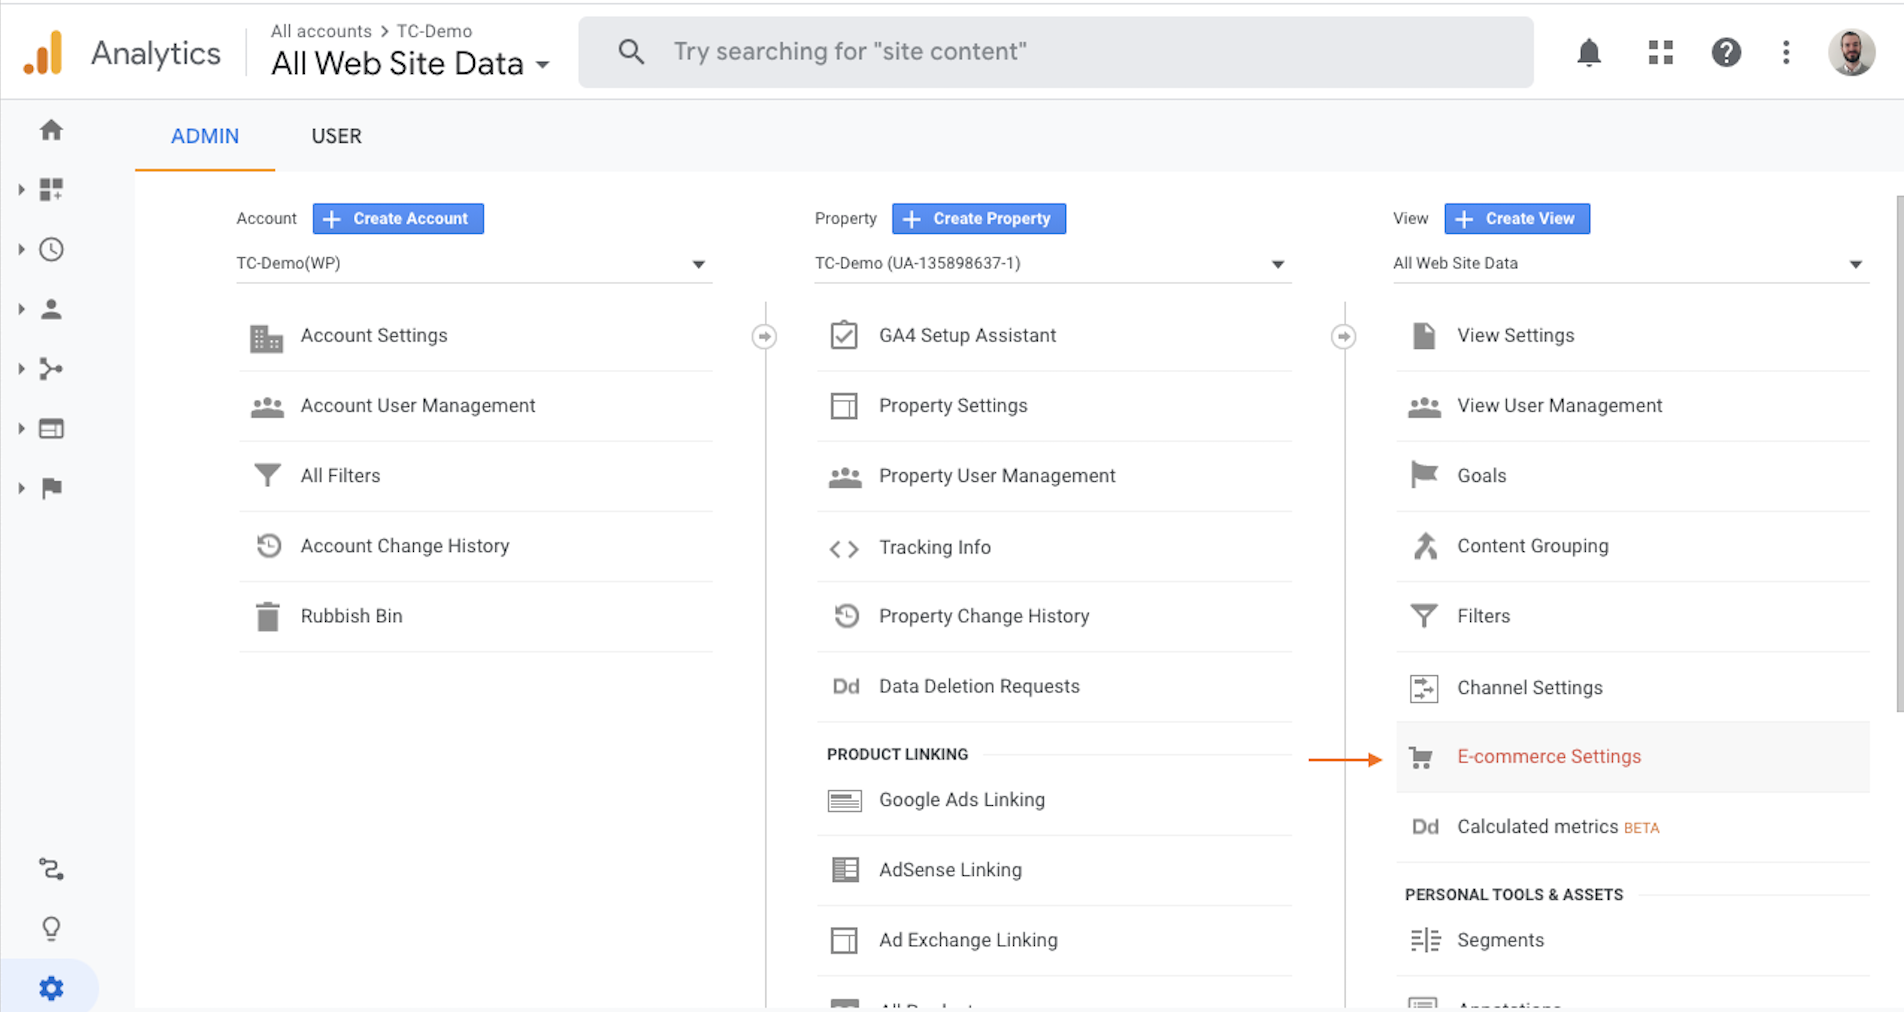
Next, head to your Google Analytics account. Select Admin and find Tracking Info. Click on Tracking Code and then copy the code found under Tracking ID. The code will begin with "UA" and then be followed by a series of numbers.
While you are in Analytics you can also enable Enhanced ecommerce tracking, which is located under View and E-commerce Settings. Click Save.
 |
 |
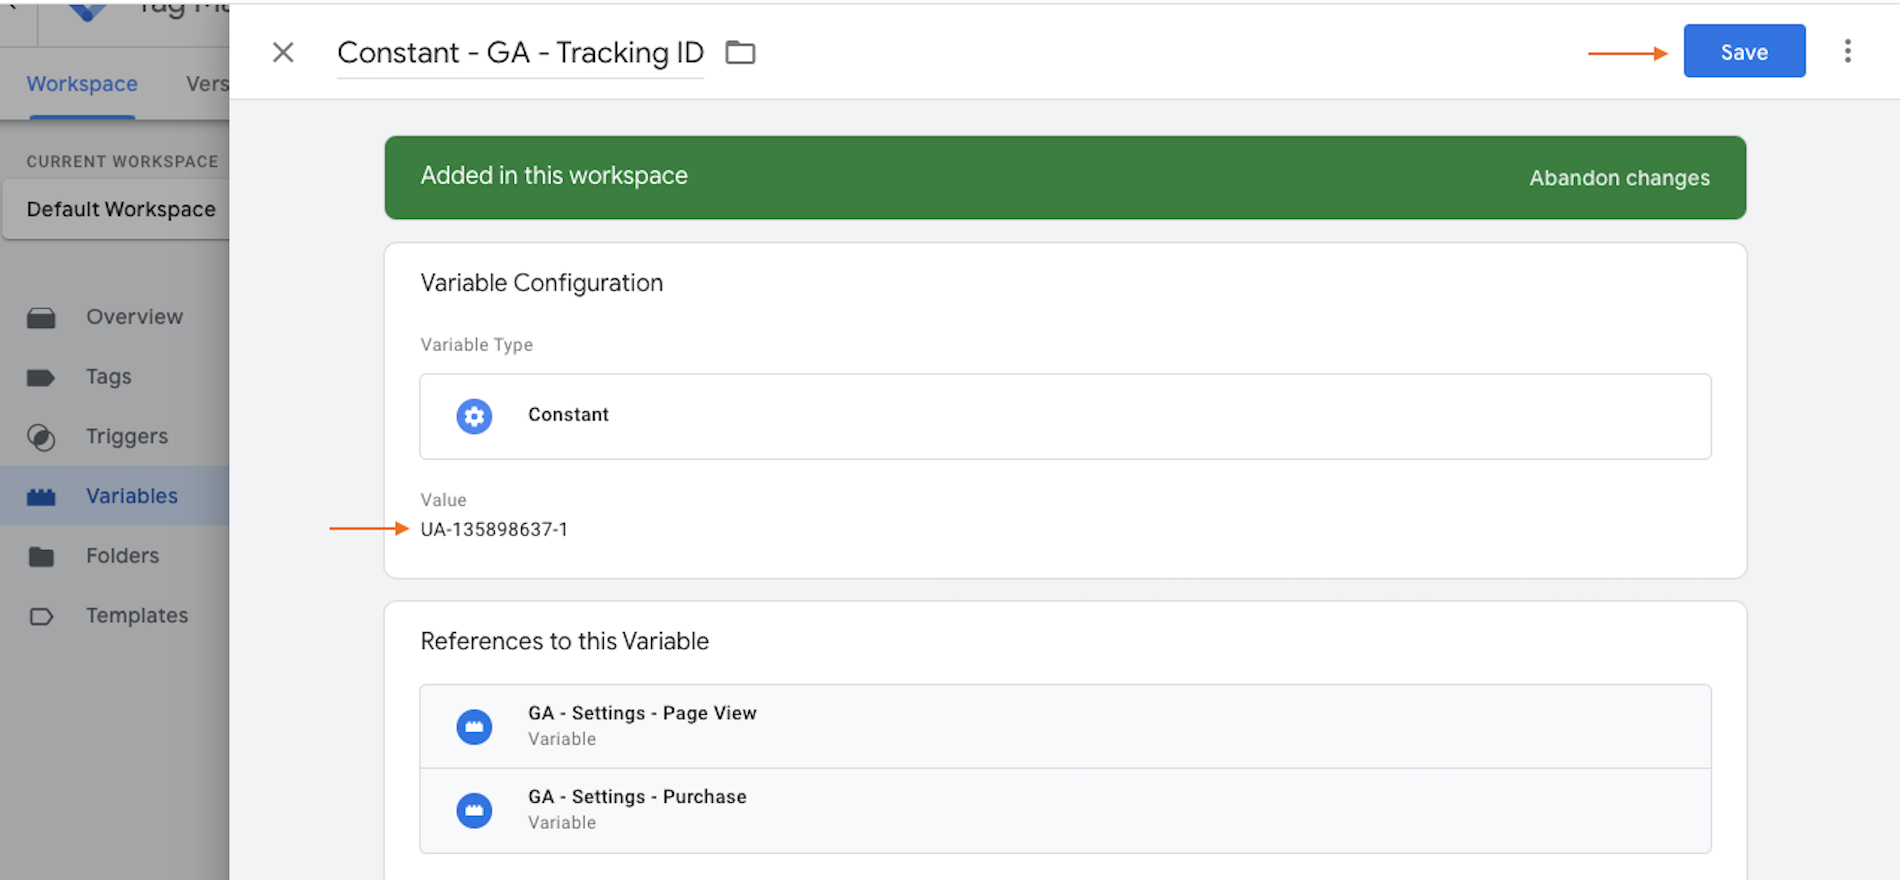
Back in Google Tag manager, head back to Variables, then select Constant GA - Tracking ID and paste inn your code (the tracking ID you have just copied from Google Analytics).
 |
 |
Step 4: Setting up Google Analytics 4
Open Google Analytics 4. Select Admin and find Data Streams, which is located under Property. Select the stream you want to use, and copy the Measurement ID.
 |
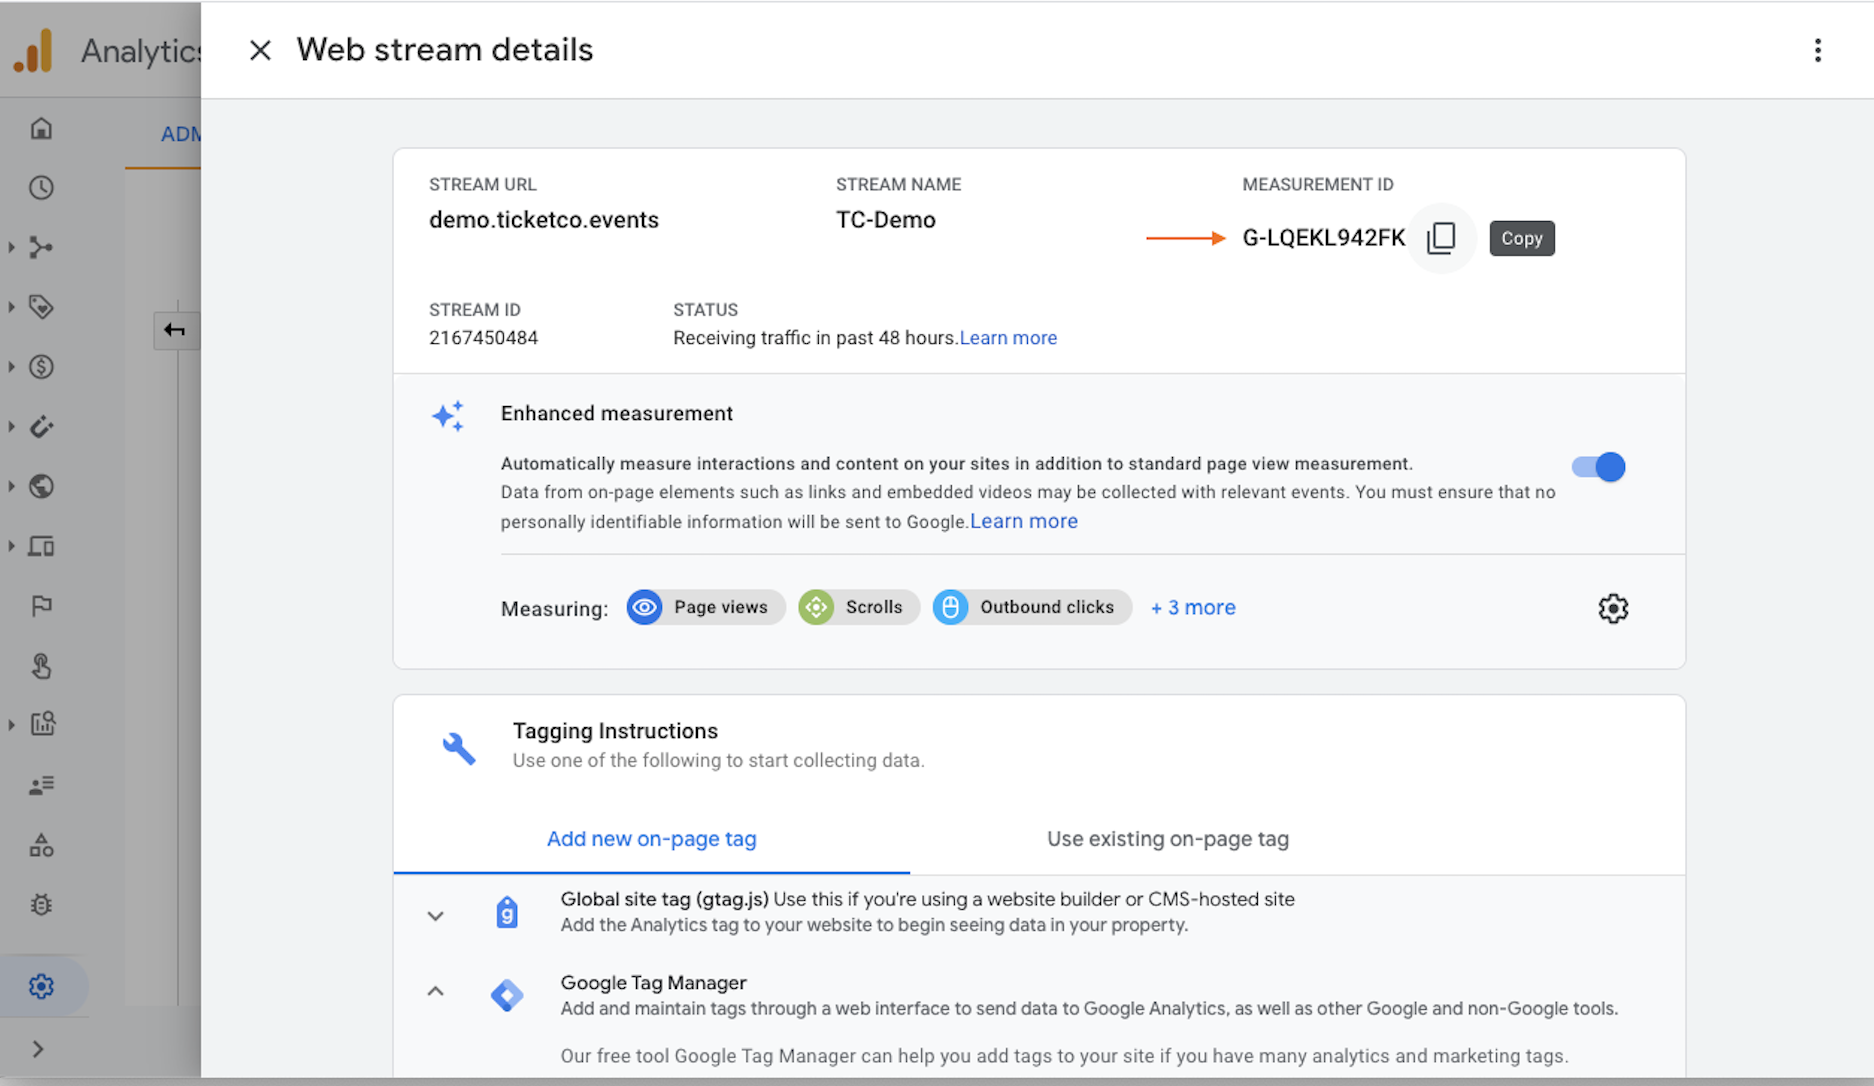 |
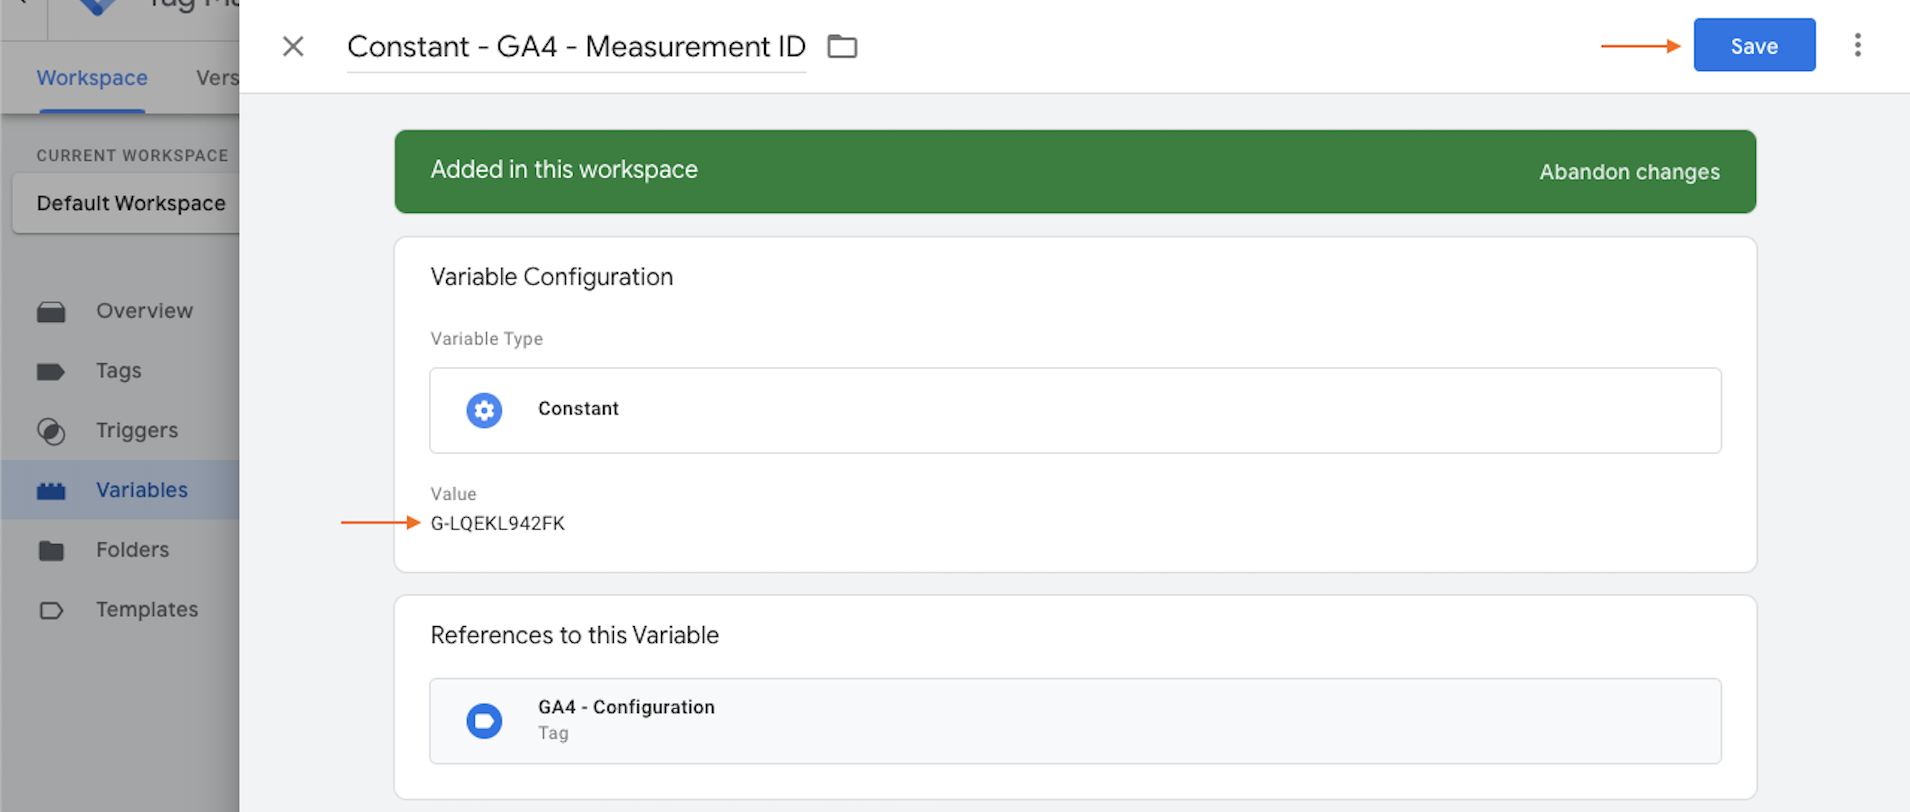
Then go back to your Tag Manager variables, find Constant - GA4 - Measurement ID and paste your Measurement ID in the Value field, and Save.
Step 5: Adding your GTM container to TicketCo
Next, you need to add the container to your TicketCo domain. Copy your Container ID, which should start with "GTM" followed by a series of numbers and letters.
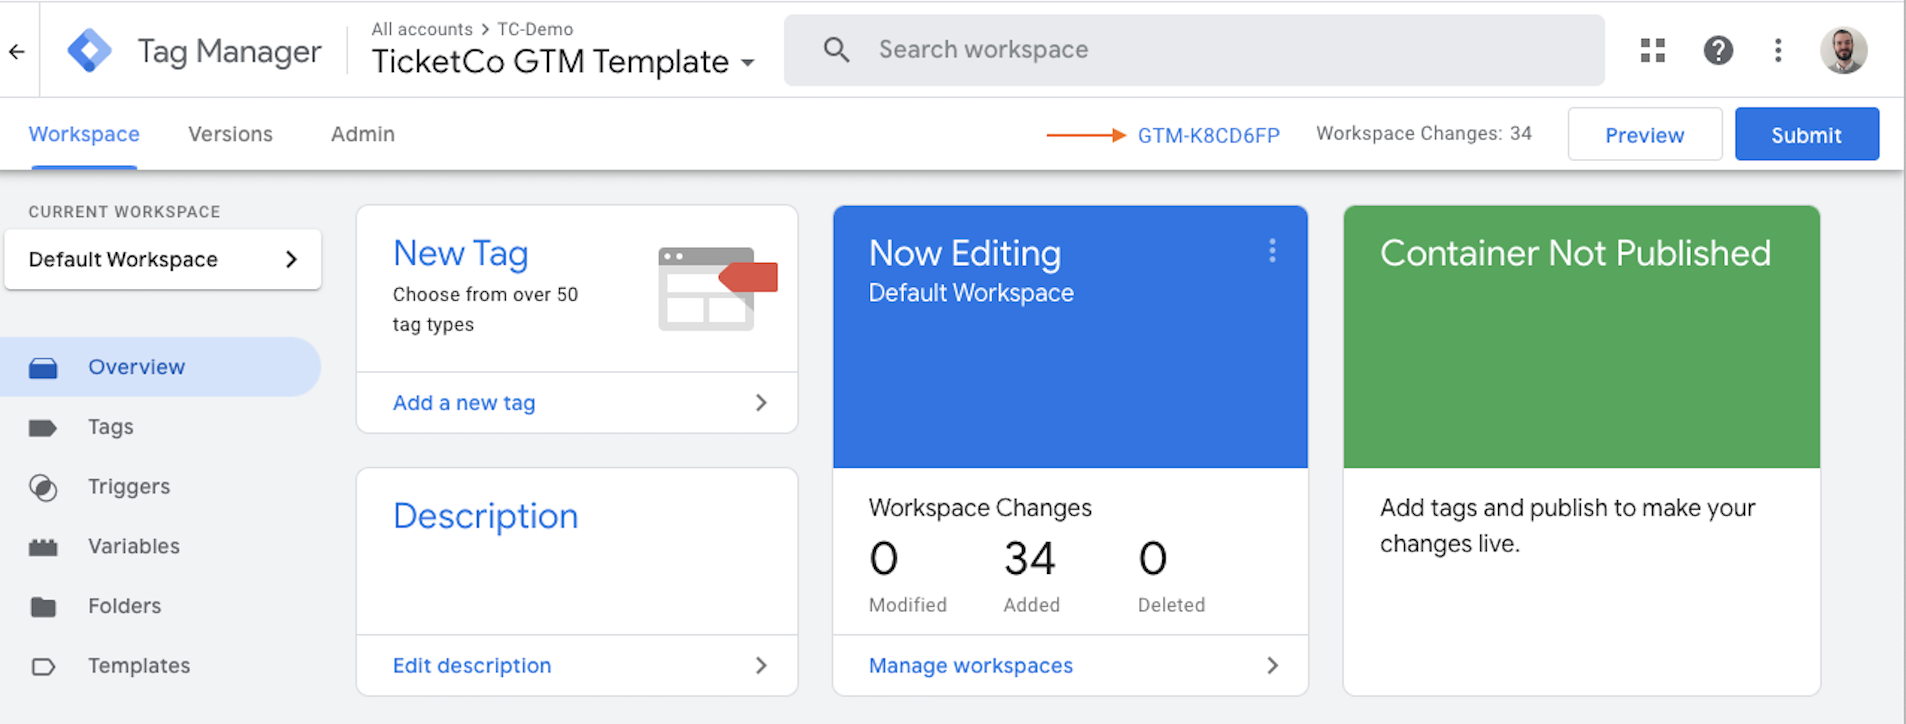
Go to your TicketCo page, and select Promote in the main menu. Go to Google Tag Manager and paste in your GTM Container ID. Click Save.
Step 6: Publishing the GTM container
Finally, you will need to publish the container you have created; although we first recommend pausing the tags you are not using to limit unnecessary requests made by your customers. This can be done by clicking Tags in the side menu, selecting the unused tags and clicking the Pause” button as shown below.
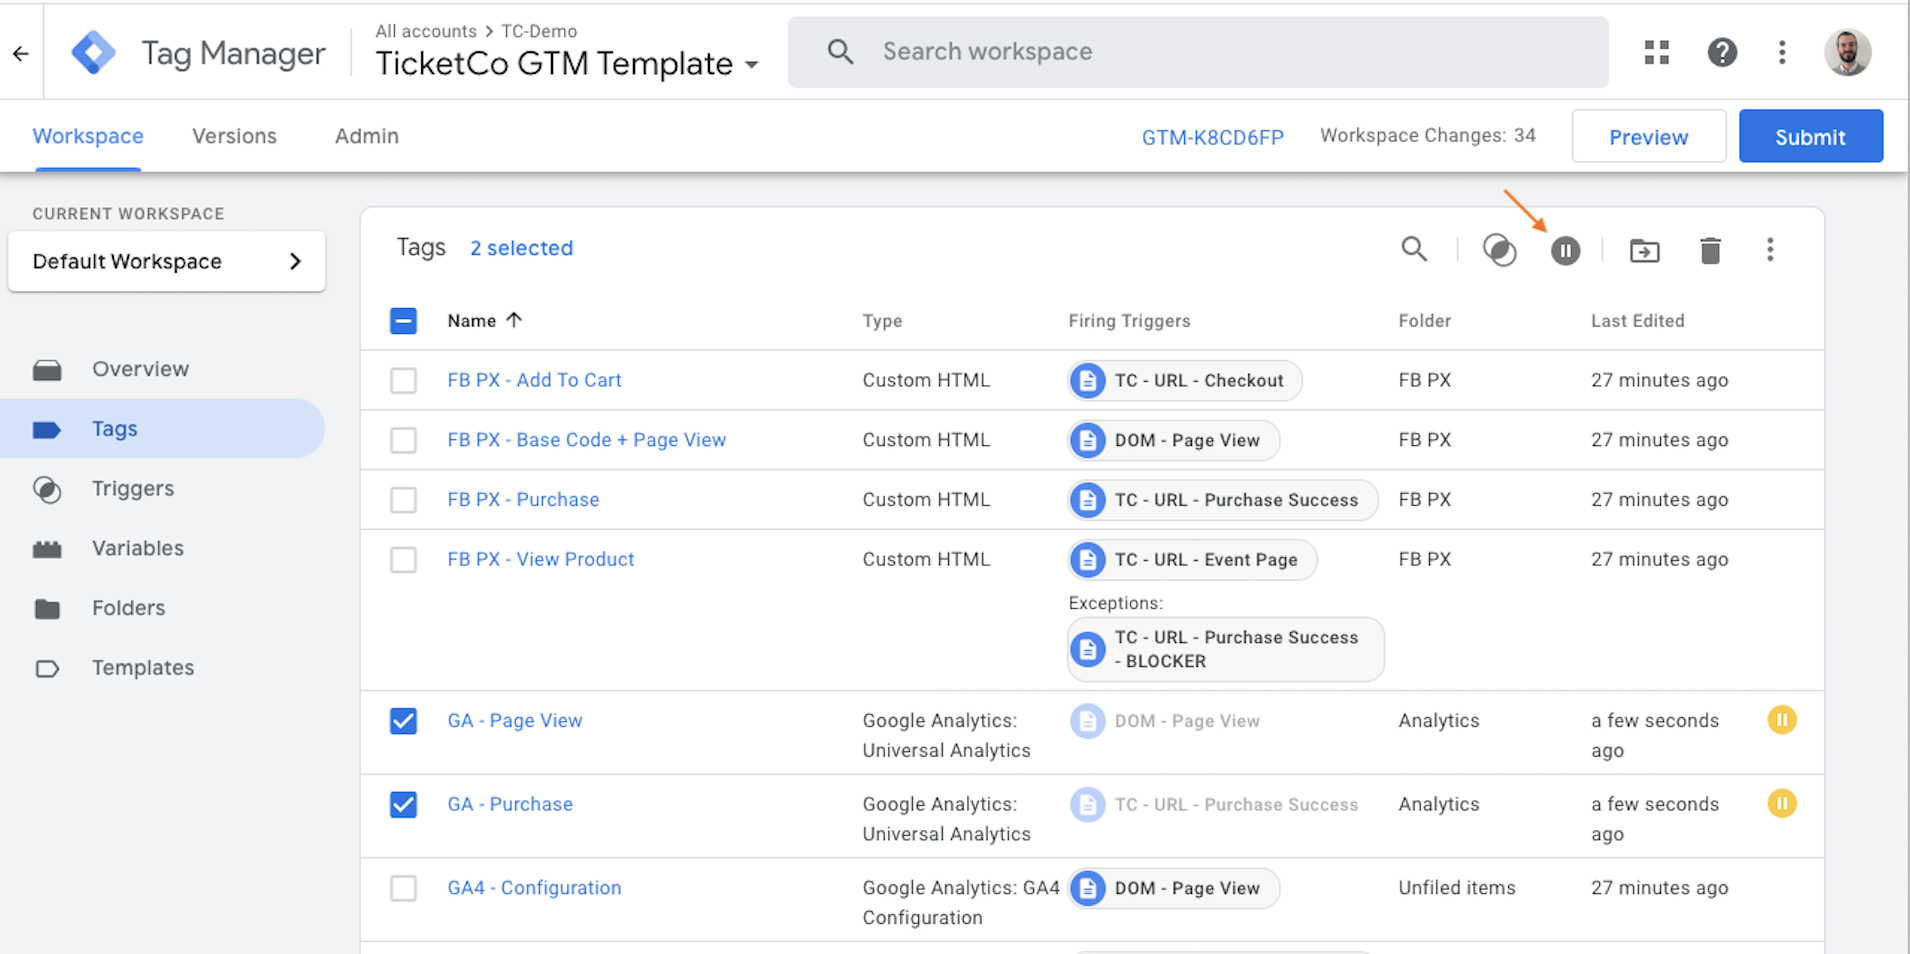
To publish the container, click Submit. Add a name and a short description, then hit Publish.
 |
 |
Congratulations! You have now deployed Google Analytics with Google Tag Manager and Facebook Pixel ID.
Step 7: Testing and debugging
To ensure that the container is working as it should, you should use the Preview feature in Tag Manager.

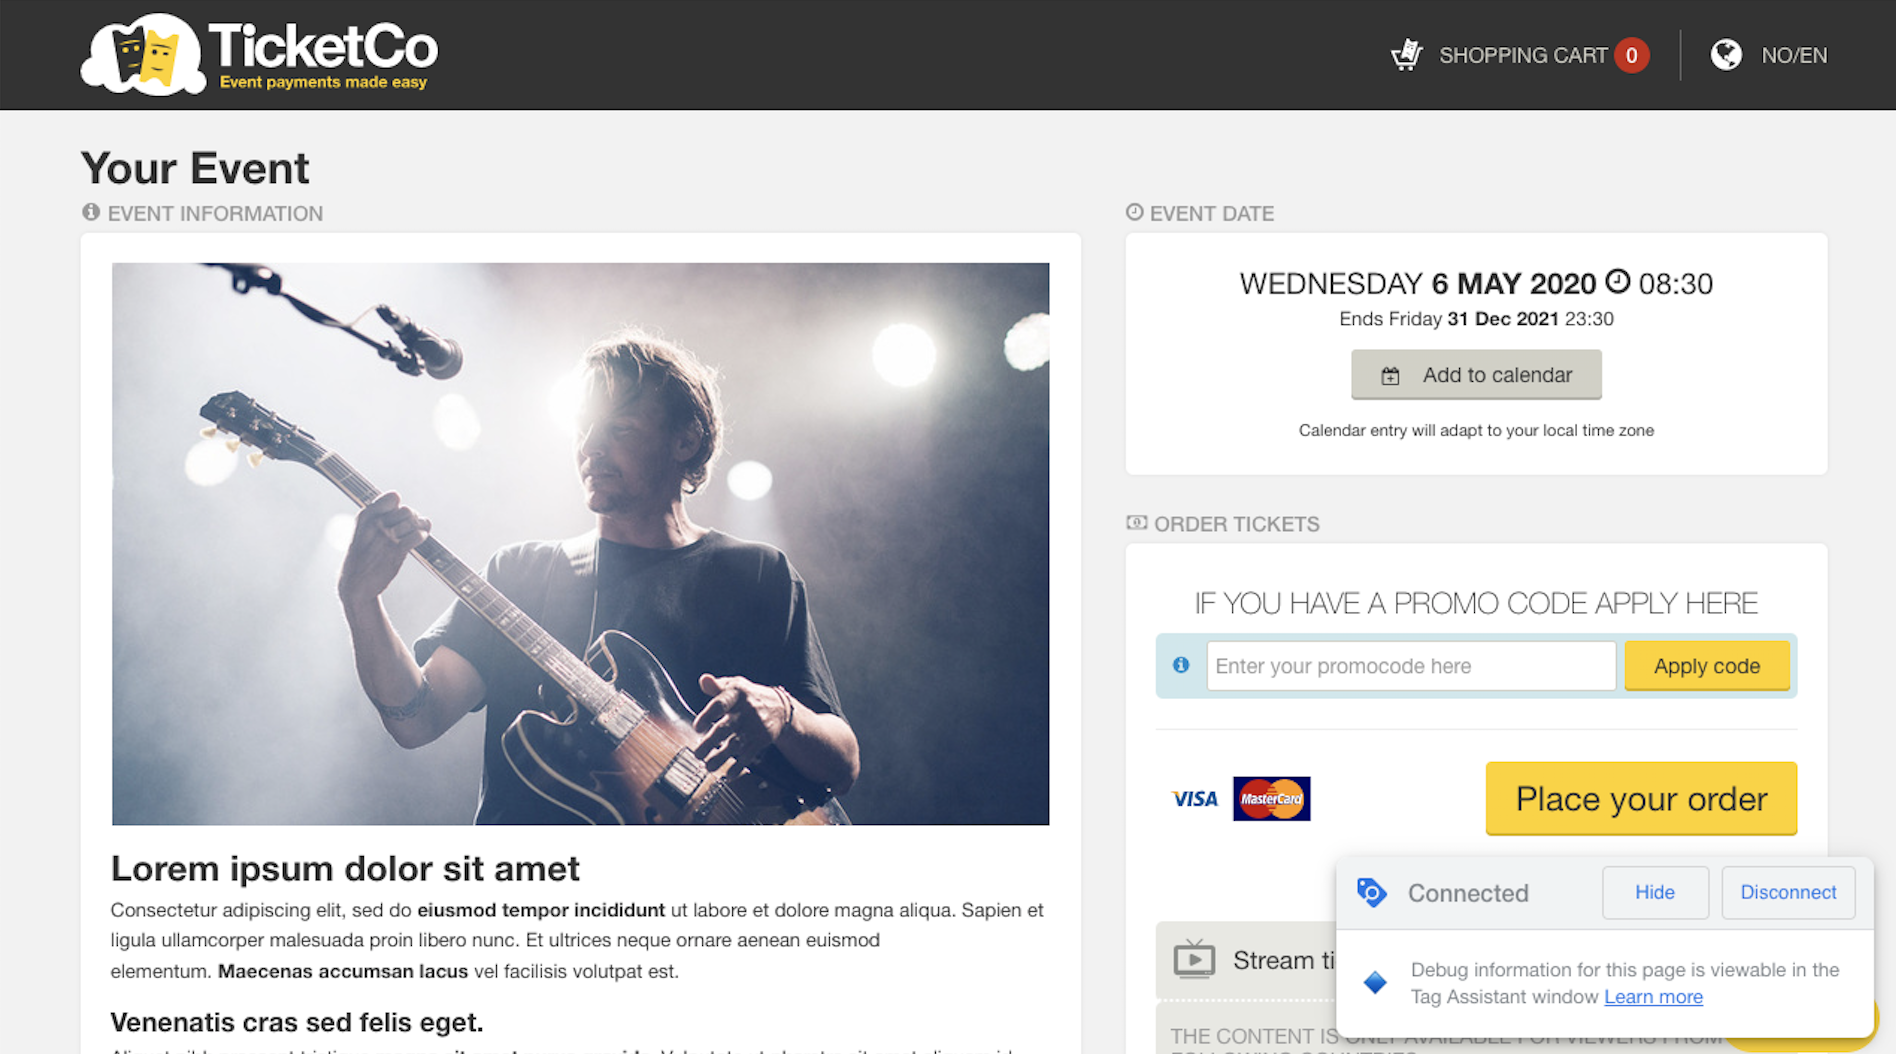
Add the URL to your TicketCo page and click Connect.
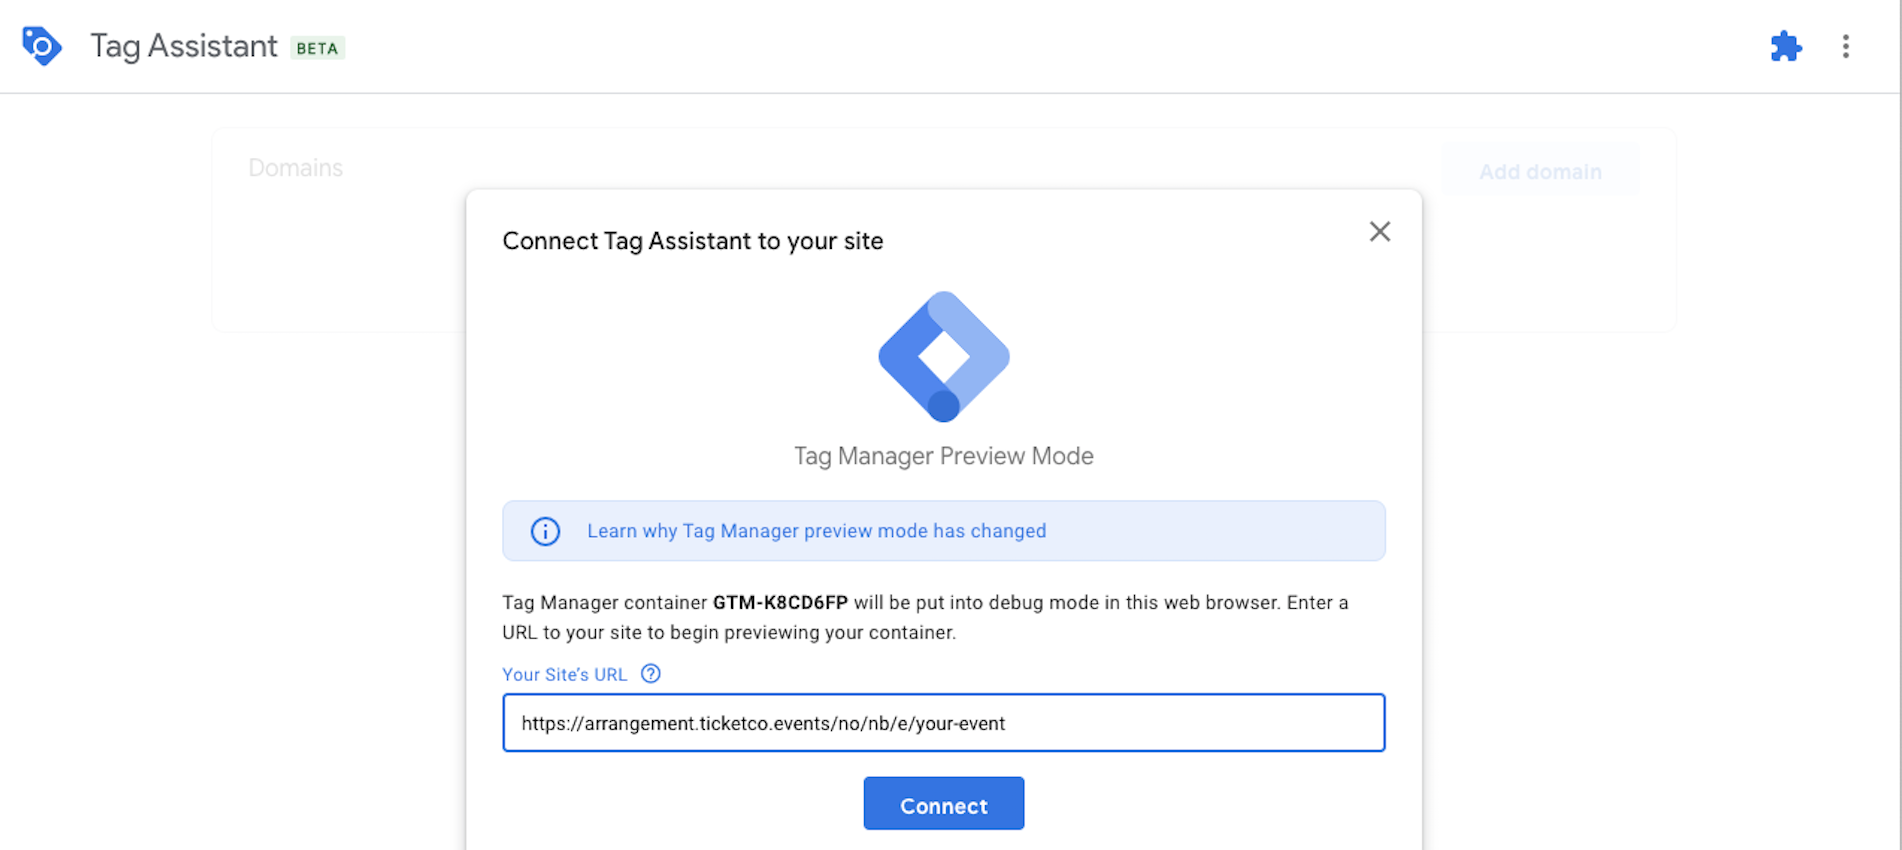 Then, you can check that your tags have been triggered in the debugger / preview tab.
 |
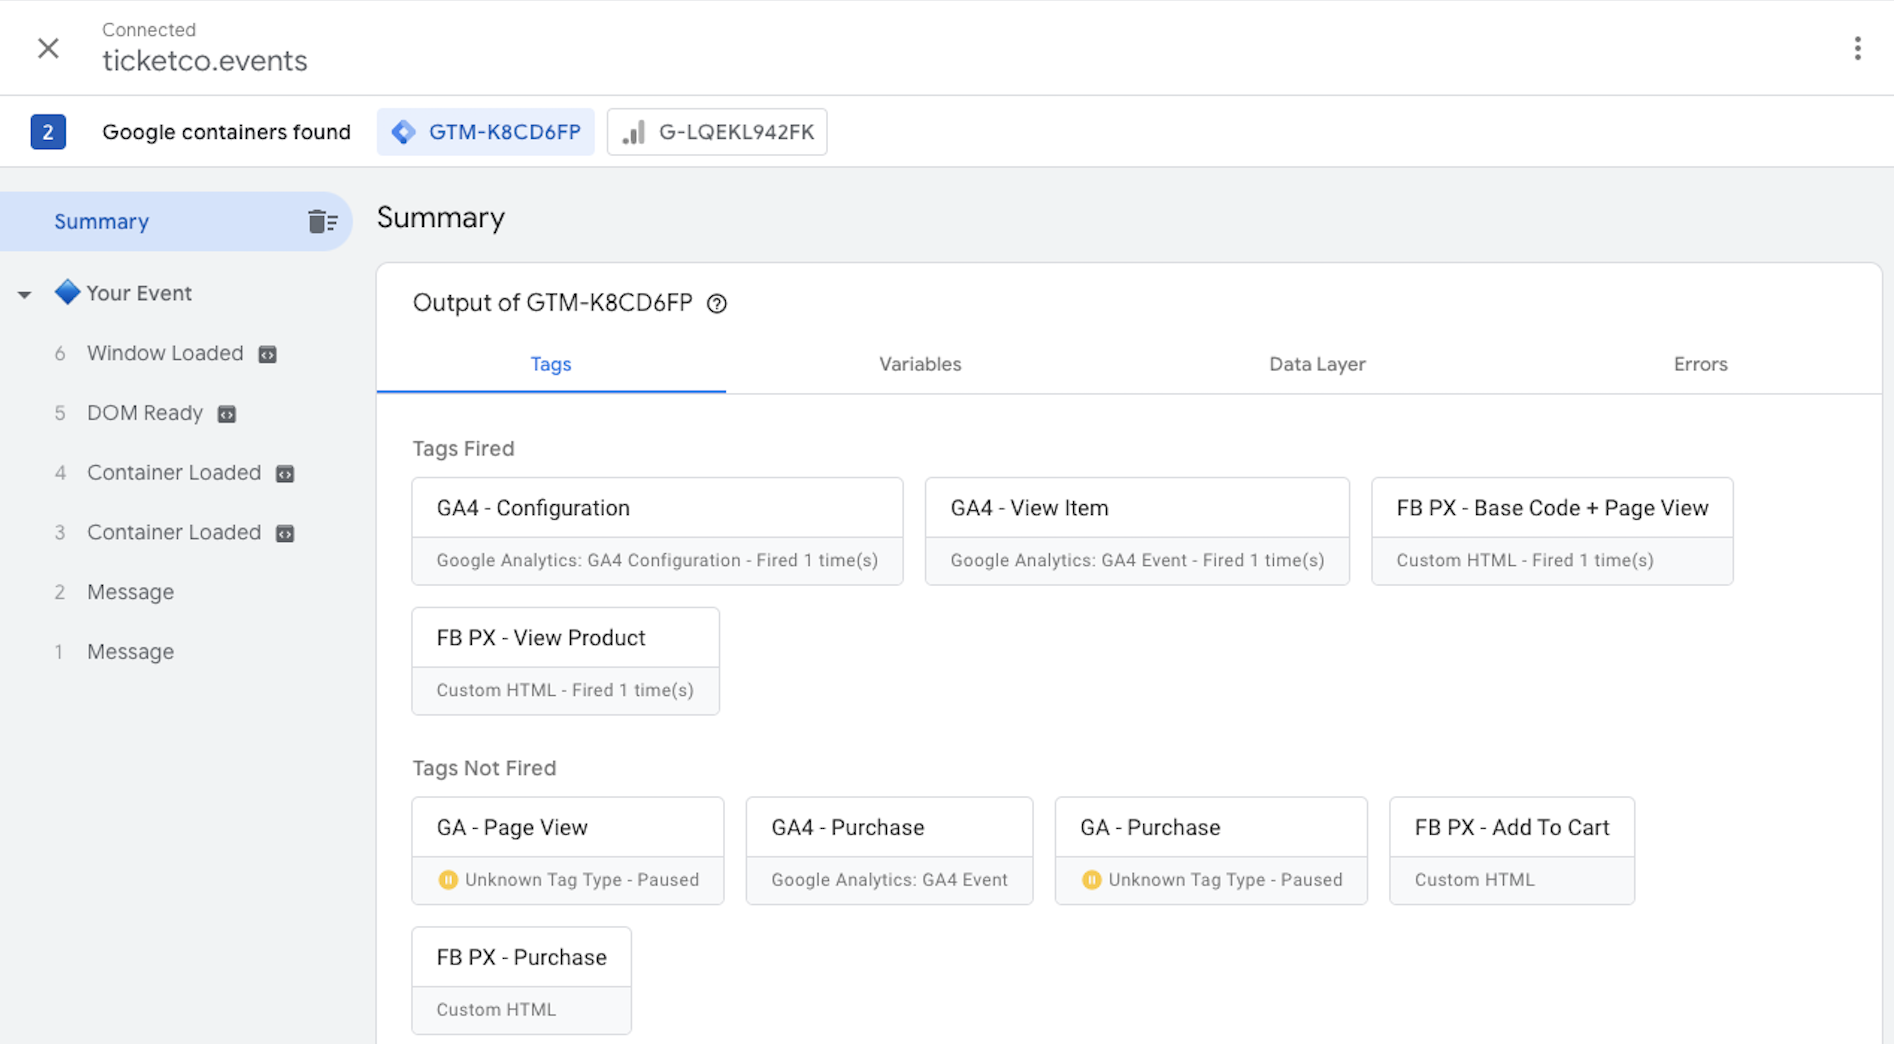 |
You could even test the customer journey by e.g. buying a free ticket while monitoring the preview tab.
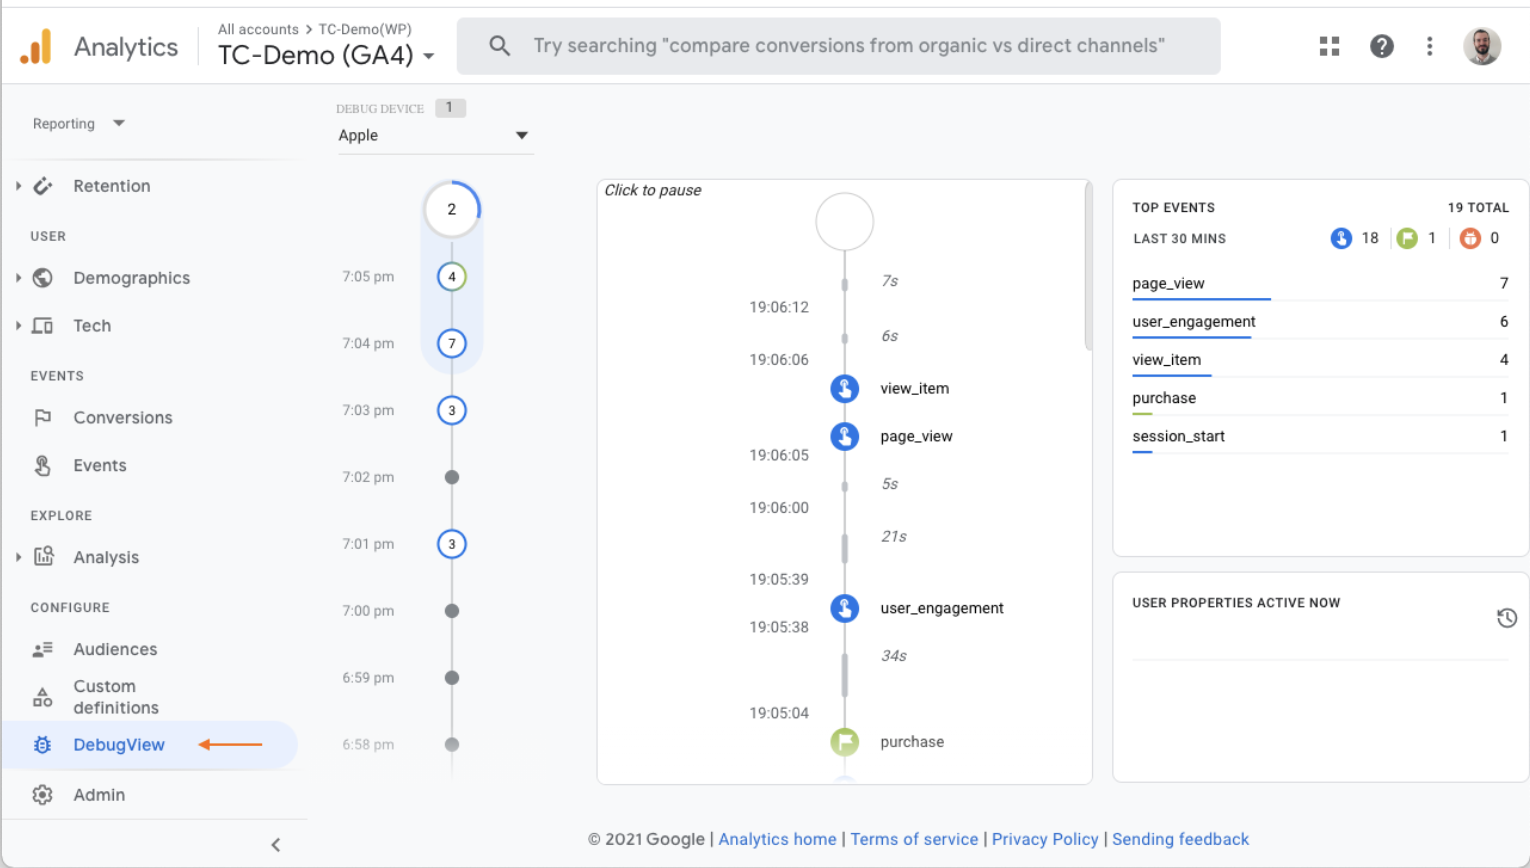
We hope that this guide has helped you to successfully set up your GTM tracking. For further assistance, if you are using Google Chrome, you can also download “Facebook Pixel Helper” and "Google Tag Assistant" to check that your Pixel is added and that your container is working properly. Google Analytics 4 also comes with a “Debug View” which allows you to debug your GA4 tags while using Tag Manager’s preview mode.
